Check out more than 60 custom ROMs for LG Optimus Me P350 on Hack My Android Forums.
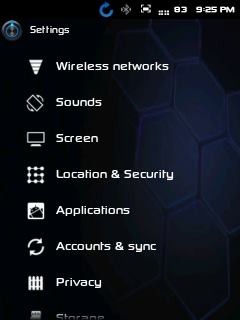
If you own an LG Optimus Me P350, you must be knowing that your LG Optimus Me runs Android 2.2 Froyo. LG had not provided any update for the OS, though you can try out CyanogenMod 7.2 or CyanogenMod Nightlies ROM to get Android 2.3.7. If you wish to go beyond this, you can install Honeycomb on LG Optimus Me P350. ICS is coming soon for this phone and we’ve got some screenshots of ICS 😀 Coming back to Honeycomb, Cips Gokhle has developed this ROM and Venkat Kamesh has rectified the bugs. It is a themed CM 7.2 ROM and everything works well on this. I am using this ROM right now and it really has a very good UI. Let us now see some screenshots and the tutorial to install Honeycomb on LG Optimus Me P350.
Screen Captures of Honeycomb on LG Optimus Me P350
Prerequisites
- Before you install any ROM on your phone, it is always advisable to take a back up of your phone’s data. Backing up your contacts is easy and you can back up all your contacts to your phone’s SD Card.
- To back up your applications, I recommend you to use ASTRO File Manager which also allows cloud storage.
- Make sure you have enough battery on your device to support the installation. If the device powers off due to lack of battery power, it may brick the device.
- Custom Recovery Installed
Disclaimer: BlogoTech is not responsible for any damage that might be caused to your device during this process though the possibility of any damage is negligible. Try this at your own risk.
Steps to Install Honeycomb on LG Optimus Me P350
- Download – Honeycomb ROM – ROM zip file | Google Apps | Browser fix zip files.
- Place all the three zip files in the root of your sd card. By root of your sd card, I mean the SD card itself and not within any folder. This makes it easy for you to find the zip files while in recovery mode
- Boot into recovery. To do this, you can press the Call button + Volume Down button and holding both simultaneously press the Power button. In the recovery mode, use the Volume buttons to navigate and Menu button to select.
- Important: Make a nandroid backup which will be useful if you wish to revert back.
- Select Install zip from SD card>Choose zip from SD card and select the three zip files you placed in your SD card and flash them in order as listed in Step 1.
- Go back and select Reboot system now.
- In case you get stuck at the logo or face force close issues, re-insert the battery and boot into recovery and wipe cache.
- Your phone will now be running Android 3.2.2 Honeycomb.


