You can now install ICS 4.0.3 on Samsung Galaxy S2 using XXKP8 firmware. Follow this guide to install Ice Cream Sandwich 4.0.3 on Samsung Galaxy S2.
It’s a new year 2012 and you need to show some love to your Android device. Today I’ll tell you a way to install Ice Cream Sandwich on Samsung Galaxy S2 GT I9100. Before we proceed with the steps, let me give you some information regarding this update.
- Your warranty would be void after this as this method uses a custom kernel.
- This method does not require root access to your phone. In case you have already rooted your phone, this method will revoke root access.
- If you are already using a custom ROM, access Recovery mode by pressing Volume Down Key + Center Button (Home) and holding both simultaneously press the Power Button. In Recovery Mode, select ‘Wipe data/factory reset’ and ‘Wipe Cache partition’. Reboot your phone after this.
Prerequisites
Before you follow the procedure, you need to make sure you follow these steps:
- Take a back up of your contacts to the SD Card and all the applications. You can back up using ASTRO File Manager.
- Disable system tools on your computer such as antivirus software, firewall programs, Samsung KIES, and PC suites. These may interfere while updating your phone.
- Enable USB Debugging by going to Settings>Applications>Development>Enable USB Debugging.
Steps to Update Samsung Galaxy S2 GT I9100 to ICS Android 4.0.1 XXKP2 Firmware
I assume you have taken a back up, after which you can proceed with the steps to install the update:
- Download ICS Android 4.0.1 XXKP2 zip package from here. After you extract the contents of the zip file, you must get the following files:
- I9100_APBOOT_I9100XXKP2_CL17109_REV02_eng_mid_ship.tar.md5
- I9100_CODE_I9100XXKP2_CL17109_RE02_eng_mid_ship.tar.md5
- I9100_KERNEL_I9100XXKP2_CL17109_REV02_eng_mid_ship.tar.md5
- MODEM_I9100XXKP1_REV_02_CL1085642.tar.md5
- Odin3 v1.83
- u1_02_20110310_emmc_EXT4.pit
- After this, turn off your phone and switch to Download Mode by pressing the Volume Down key and Home button (middle key) simultaneously, while pressing the Power button.
- Run Odin3 v1.83 which is present in the folder where you have extracted the files.
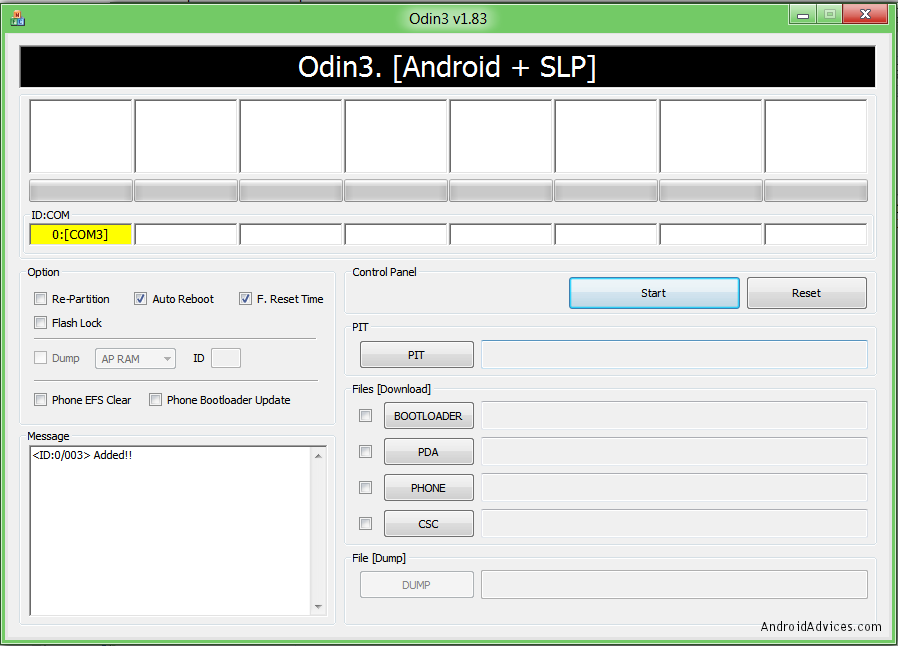
- Connect your phone to the PC via USB Cable (USB Debugging Enabled). After a minute you would find the ID:COM in Odin turn Yellow. This indicates that you have successfully connected your phone to the PC and you can proceed to the next step.

- In Odin, click on the following options and select the extracted files written adjacent to the options respectively (you can also refer the image below)

Click to Enlarge PIT: u1_02_20110310_emmc_EXT4.pit
BOOTLOADER: I9100_APBOOT_I9100XXKP1_CL16459_REV02_eng_mid_ship.tar.md5,
PDA: I9100_CODE_I9100XXKP1_CL16459_REV02_eng_mid_ship.tar.md5
Phone: MODEM_I9100XXKP1_REV_02_CL1085642.tar.md5 - Once this is done, click on Start and this will update Samsung Galaxy S2 GT I9100 with ICS 4.0 Firmware. This might take 10 minutes to complete.
- If the update fails or gets stuck in the middle, you need to repeat the whole process again by disconnecting your phone from the PC and reinserting the battery.
- After this, disconnect your phone form the PC and turn it off. Switch back to download mode again.
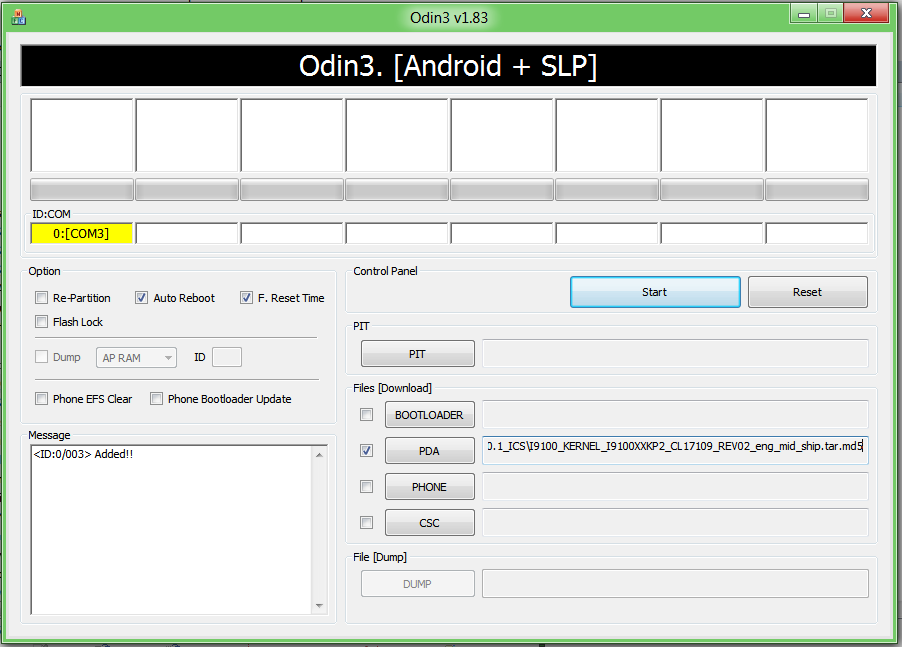
- Reconnect your phone to the PC and in Odin, select the following file:
PDA: I9100_KERNEL_I9100XXKP1_CL16459_REV02_eng_mid_ship.tar.md5
- Once this update is successful, the phone will reboot and you will be asked to enter your Google login details.
- Head over to Settings > About Phone > Firmware Version and check if it is Android 4.0.1. If it is not, you need to repeat the process.
Fix Force Close Errors
It is likely that you will face force close errors if you have flashed the kernel after flashing the firmware. To solve this you need to wipe your phone’s data. To do this you need to switch to recovery mode as mentioned above and in the recovery menu, select “Wipe data/factory rest” and “Wipe Cache Partition.” After this, reboot by selecting “Reboot System”.
Did this tutorial help you? If you face any issues, feel free to comment below:
