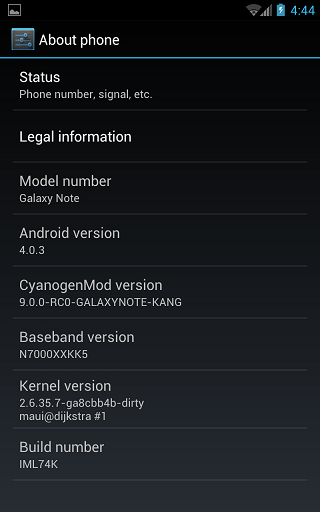
A few minutes back, I’ve published a post on how to root Samsung Galaxy Note in one click using Easy Rooting Toolkit. You can also use Unlock Root for the same. So that was regarding rooting which was an easy task. In this tutorial I will tell you how to install Ice Cream Sandwich on your Samsung Galaxy Note. Before you do it, lets see what’s working and what’s not working in this ROM as quoted from XDA
Working
- WiFi should work as expected.
- 3G/GPRS/EDGE Data and Calling
- Audio
- Touchscreen as well as the S-Pen (proprietary S-Pen Apps by Samsung are not included and wouldn’t work anyway.
- Sensors should work. (ie. at least GPS is confirmed to work properly)
Not Working
- Bluetooth is unstable. Don’t rely on it just yet
- Battery Usage doesn’t work.
- MTP Mode does not work. You need to push/pull files via adb
- Camera doesn’t work.
Prerequisites
Before you follow the procedure to install Ice Cream Sandwich on Samsung Galaxy Note, you need to make sure you follow these steps:
- Take a back up of your contacts to the SD Card and all the applications. You can back up using ASTRO File Manager.
- Rooted users can make use of Titanium Backup to back up all of your phone’s data.
- You do not need to back up data on your memory card as it would remain safe.
- Make sure you backup your current ROM
Disclaimer: BlogoTech is not responsible for any damage that might be caused to your device during this process though the possibility of any damage is negligible. Try this at your own risk. Also note, this process will void your warranty.
Requirements
- Download Odin
- Build 01022012 ODIN Version
- Build 01022012 Flashable via CWM
- Samsung USB Drivers
- GApps v6 [Optional]
Steps to Install Ice Cream Sandwich
- Boot into Recovery to wipe to do a full wipe.
- Boot into Download Mode.
- Start ODIN.
- Connect your Samsung Galaxy Note to the PC via USB
- After a minute you would find the ID:COM in Odin turn Yellow. This indicates that you have successfully connected your phone to the PC and you can proceed to the next step.
- Select the ROM from the PDA button.
- Make sure not to change any settings like Flash Lock, Re-Partition etc. Just use Auto-Reboot and F. Reset Time.
- Press Start button to flash the ROM.
- After flashing make sure to boot into Recovery and do a full wipe.
Steps to Install Using CWM
Before you proceed with this, make sure you are running a proper CWM.
- Copy GApps and CM9 ZIPs to your internal SDCard
- Boot your Samsung Galaxy Note into Recovery
- Flash CM9 zip
- Flash GApps zip
- Reset Factory Data to make Calendar working
- Reboot your Samsung Galaxy Note
- Make sure you do not restore apps using Titanium Backup
In this way you can install ICS on Samsung Galaxy Note. For any queries and updates follow the XDA forums thread.

